

A few months ago, I wrote an article about Azure Stack HCI : Présentation of Azure Stack HCI – Technical And Cloud
Now that we know about Azure Stack HCI, let’s take a look at how to set up a Sandbox environment to see the possibilities offered by Azure Stack HCI.
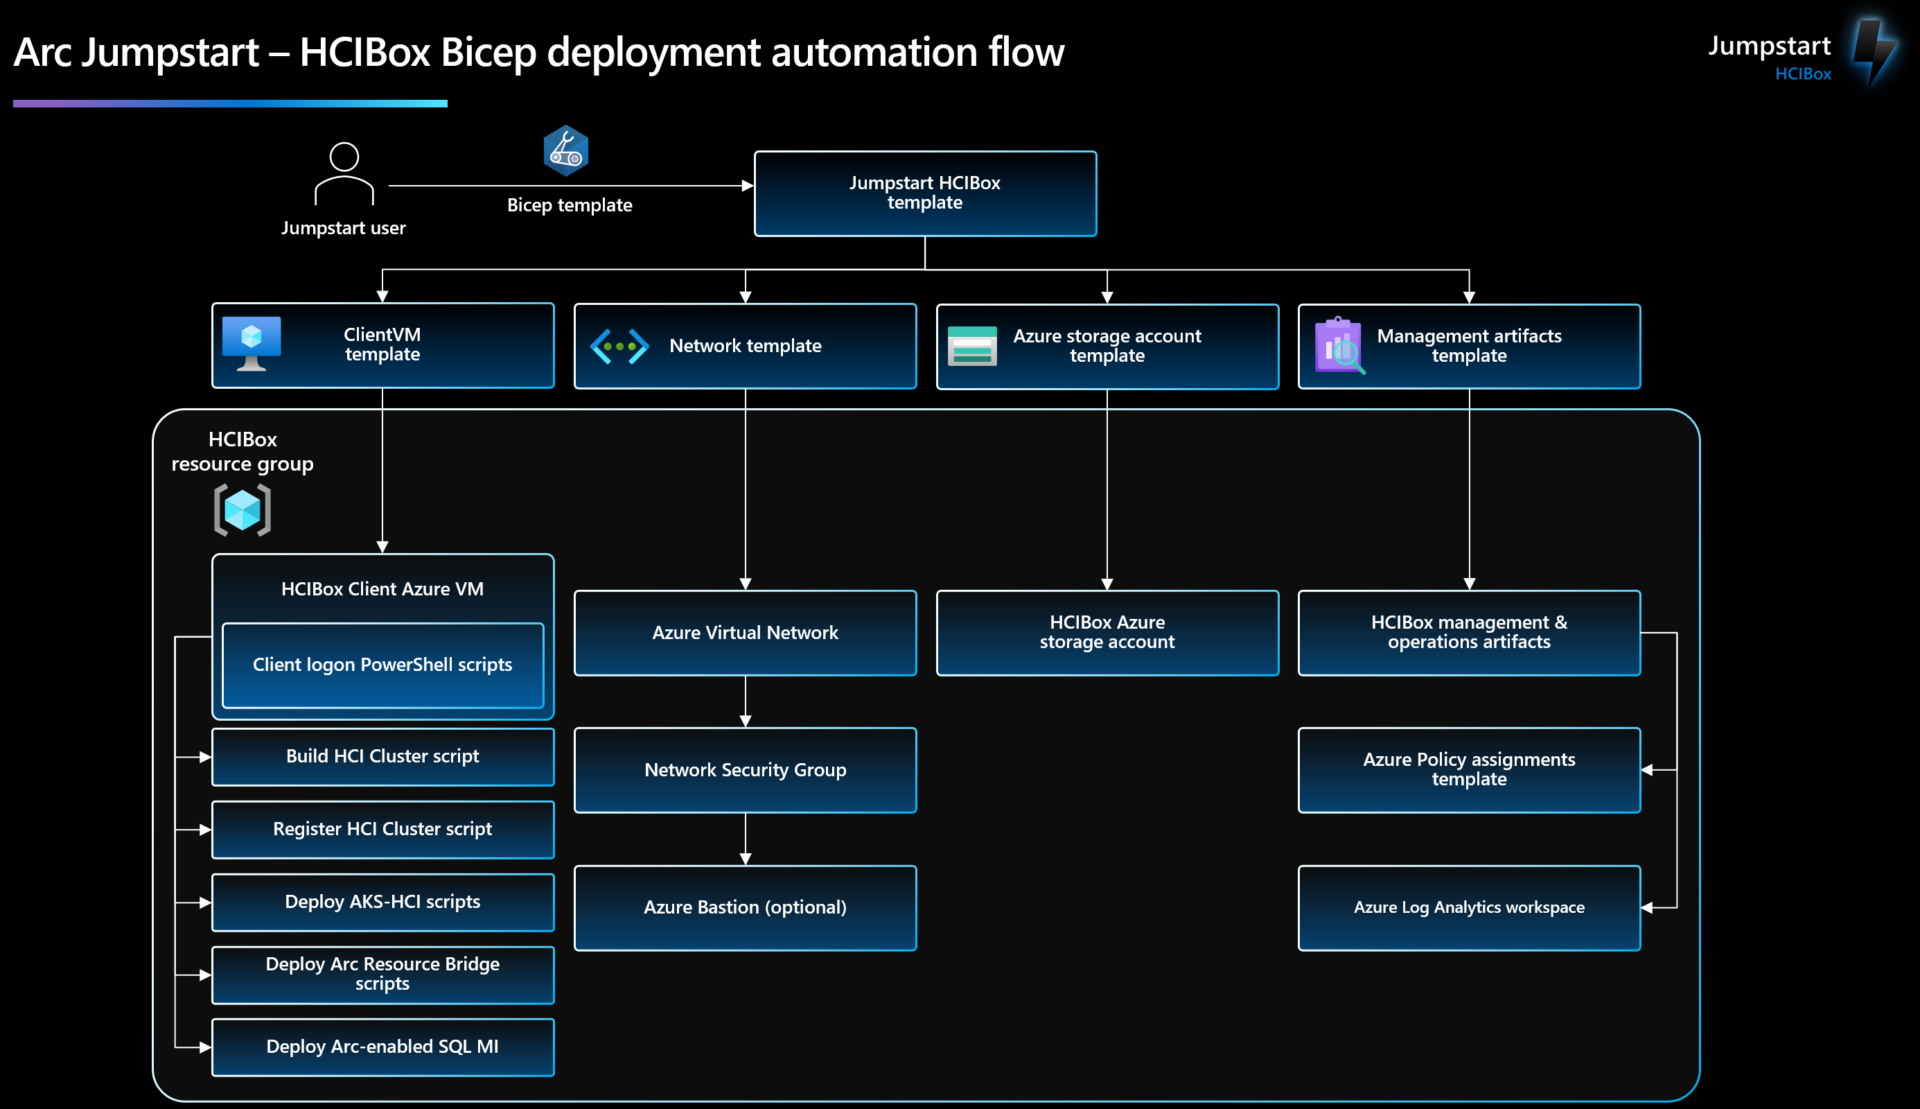
Do you know Azure Arc JumpStart ?
Azure Arc Jumpstart is an open source collaborative site in partnership with Microsoft : Azure Arc Jumpstart and it provides us with a script for deploying an Azure Stack HCI sandbox environment directly in Azure.
Deploying the Azure Stack HCI Sandbox – Prerequisites
First of all we’ll need PowerShell V7 / Azure CLI & Git :
PowerShell V7: Installing PowerShell on Windows – PowerShell | Microsoft Learn
Azure CLI: How to install the Azure CLI | Microsoft Learn
Git: Git – Downloads (git-scm.com)
Important Information: To deploy HCIBox, an Azure service principal assigned with the Owner Role-based access control (RBAC) role is required.
Deployment of the Azure Stack HCI Sandbox
We’ll need to retrieve the git below:
git clone https://github.com/microsoft/azure_arc.git
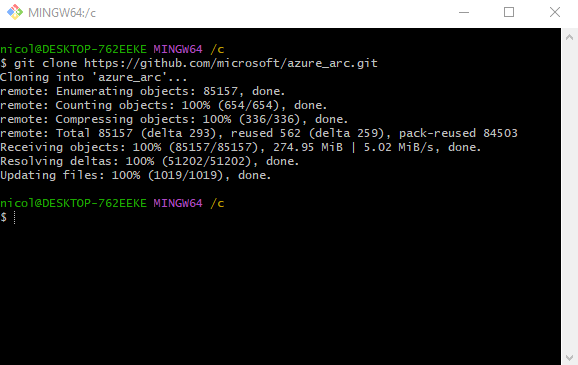
Note git is downloaded! It’s perfect!
Now we’re going to open the main.parameter.json file located in \azure_arc\azure_jumpstart_hcibox\bicep and you’ll need to fill in the following fields:
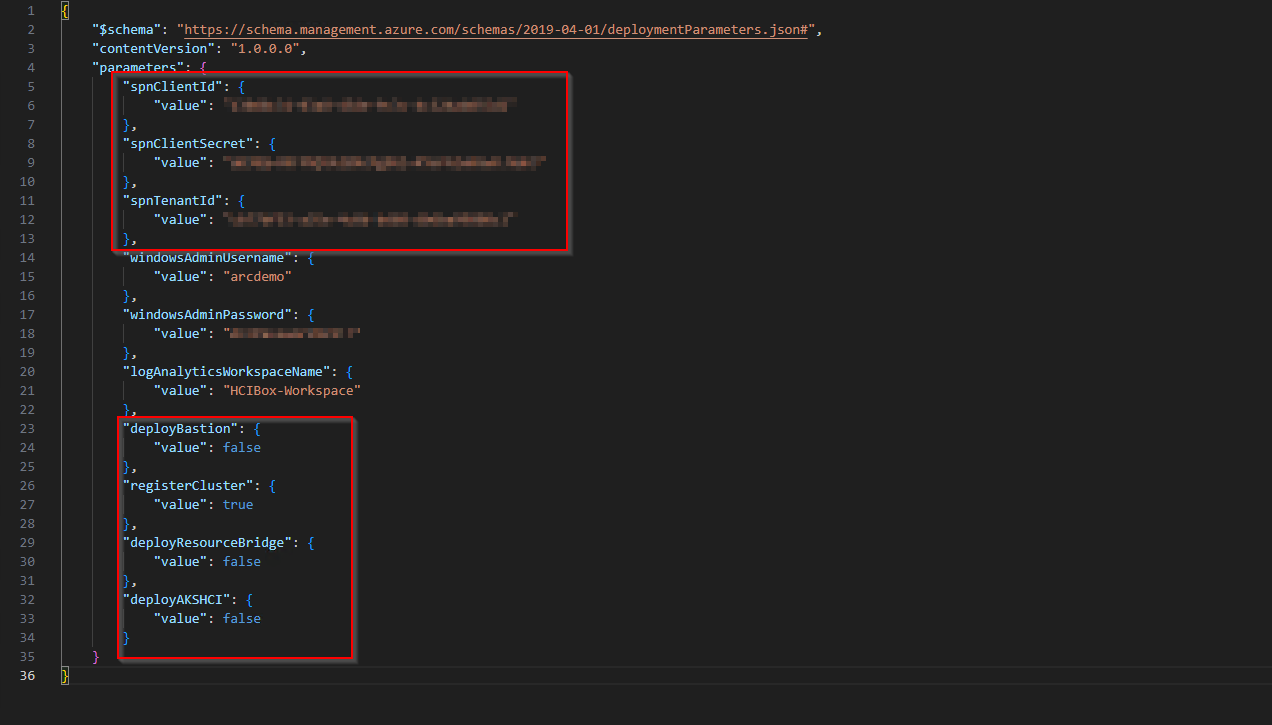
- spnClientId: Client ID of the main Azure service
- spnClientSecret: Azure main service secret
- spnTenantId: your Microsoft EntraID Azure Tenant ID
- windowsAdminUsername: Windows virtual machine administrator username
- windowsAdminPassword: password of the client Windows virtual machine. The password must contain 3 of the following elements: 1 lowercase character, 1 uppercase character, 1 number and 1 special character. The value must be between 12 and 123 characters long.
- logAnalyticsWorkspaceName: unique name of the HCIBox workspace.
- Log AnalyticslogAnalyticsWorkspaceName: unique name of the HCIBox Log Analytics workspace.
- deployBastion: option for deploying Azure Bastion, which connects to the HCIBox-Client virtual machine instead of using normal RDP.
- registerCluster: option enabling the cluster to be registered automatically; set to true by default
- deployAKSHCI: option for automatically deploying and configuring AKS on HCI; set to true by default
- deployResourceBridge: option for automatically deploying and configuring Arc Resource Bridge; set to true by default
Once these options have been configured, we run the bicep script. First we create a resource group:
az group create –name « dkhcibox-rg » –location « North Europe »
Once the resource group has been created, move to the correct directory and execute the command below:
az deployment group create -g « dkhcibox-rg » -f « main.bicep » -p « main.parameters.json »
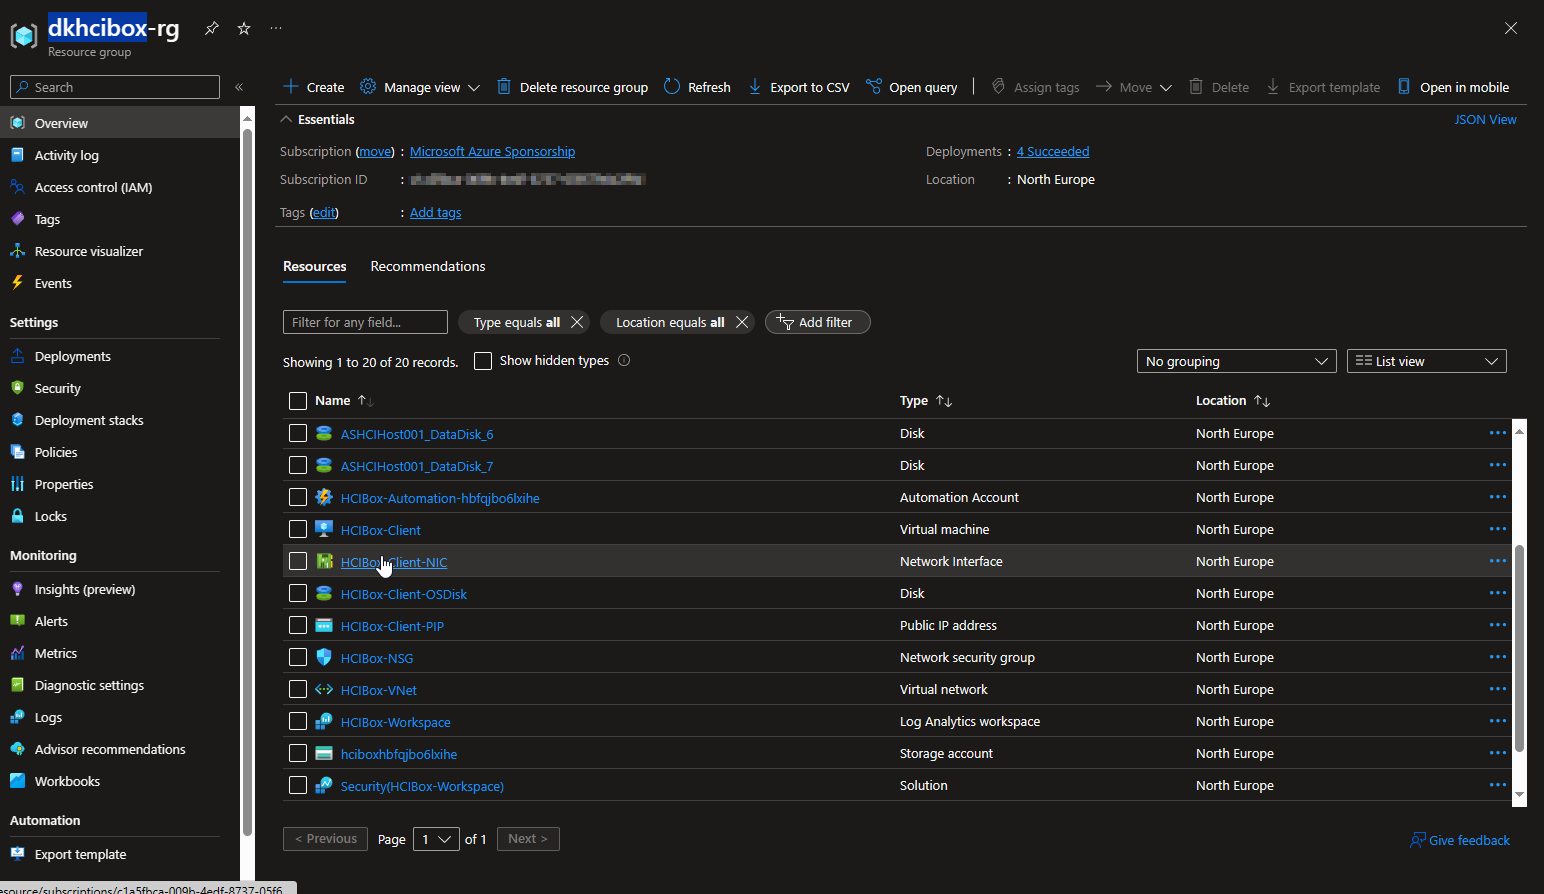
Perfect! The script was executed correctly, and the necessary resources were created:
We are now going to launch the HCIBox-Client VM in RDP:
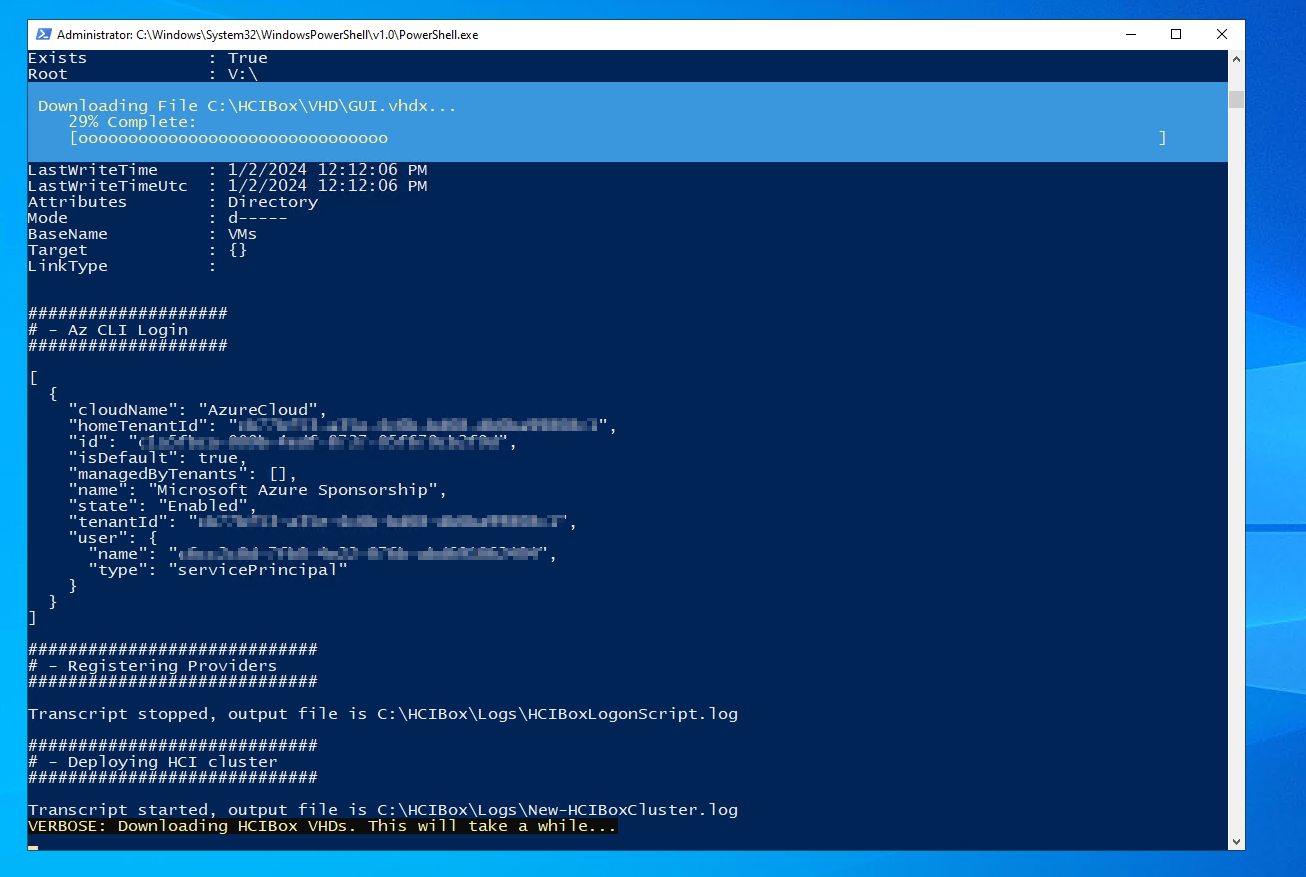
We’re going to have to wait a bit, as the configuration isn’t finished yet – it could take several hours!
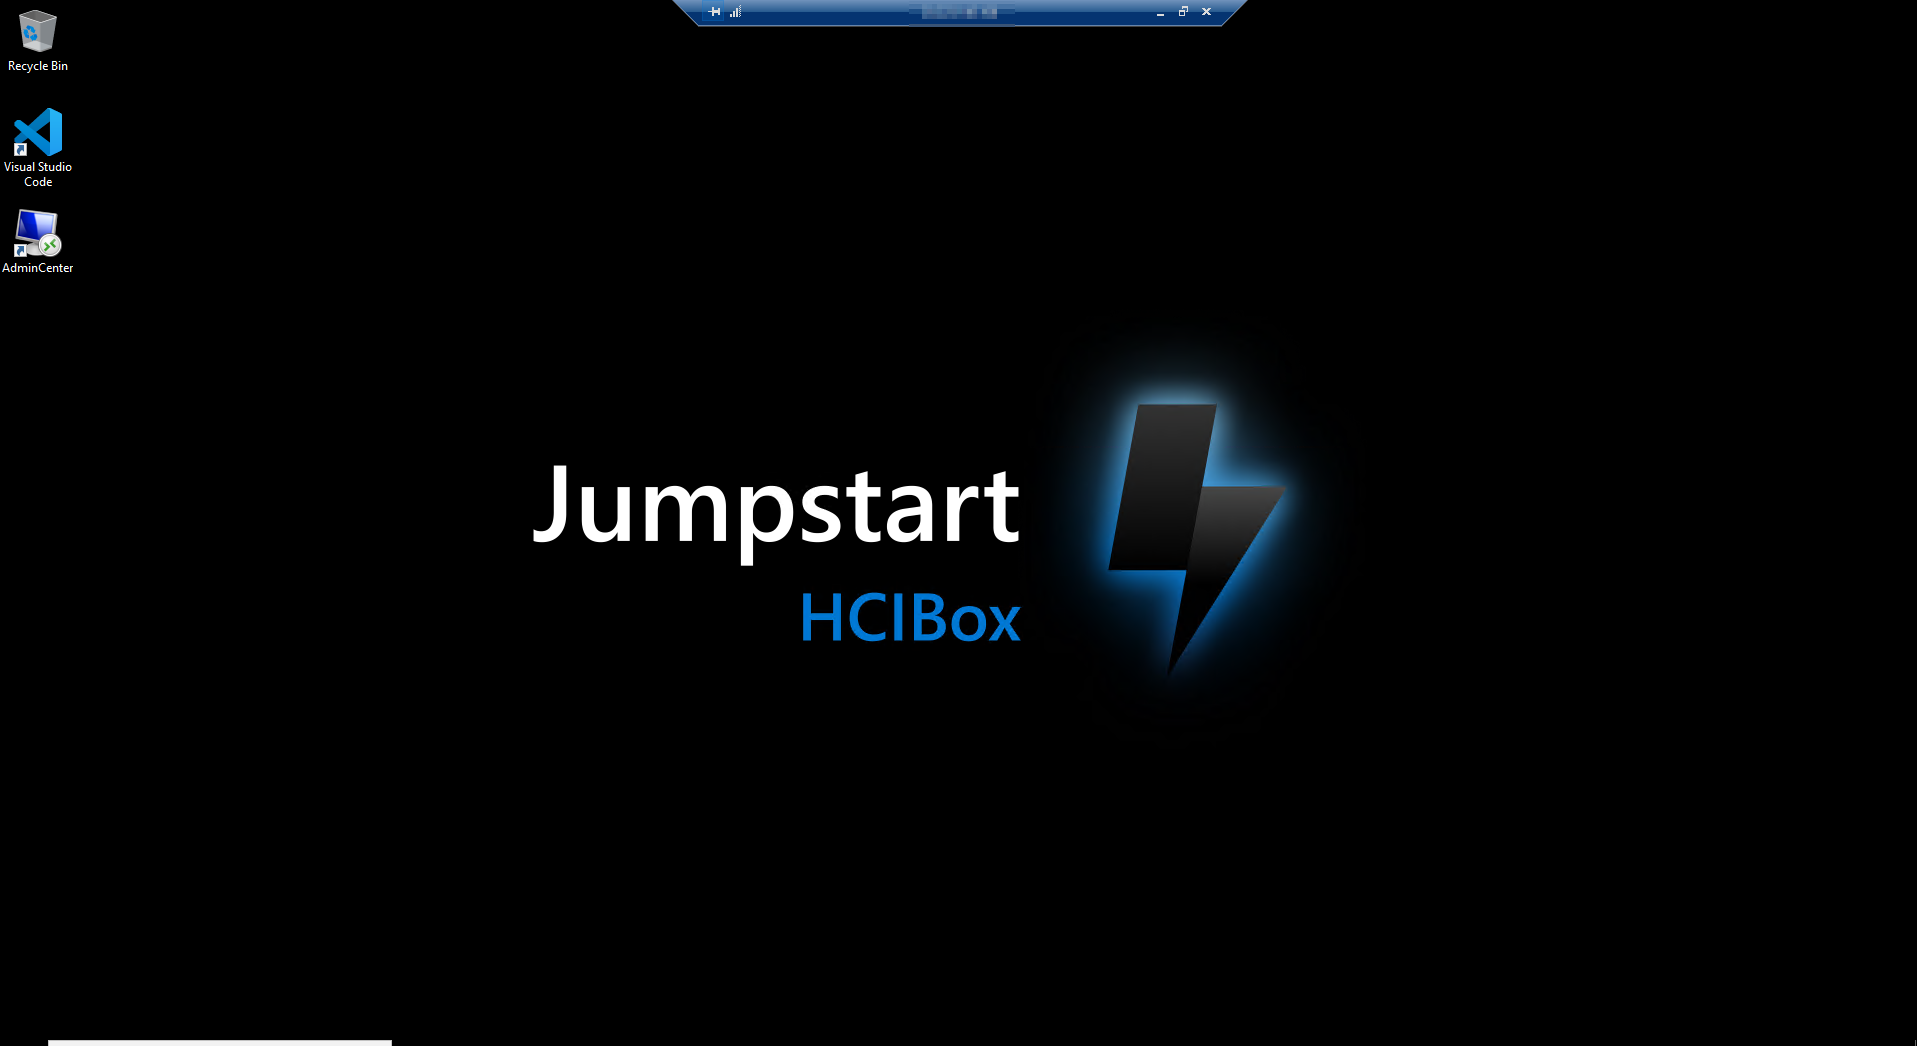
After waiting for a while, and restarting and restarting, we can see that the interface has changed:
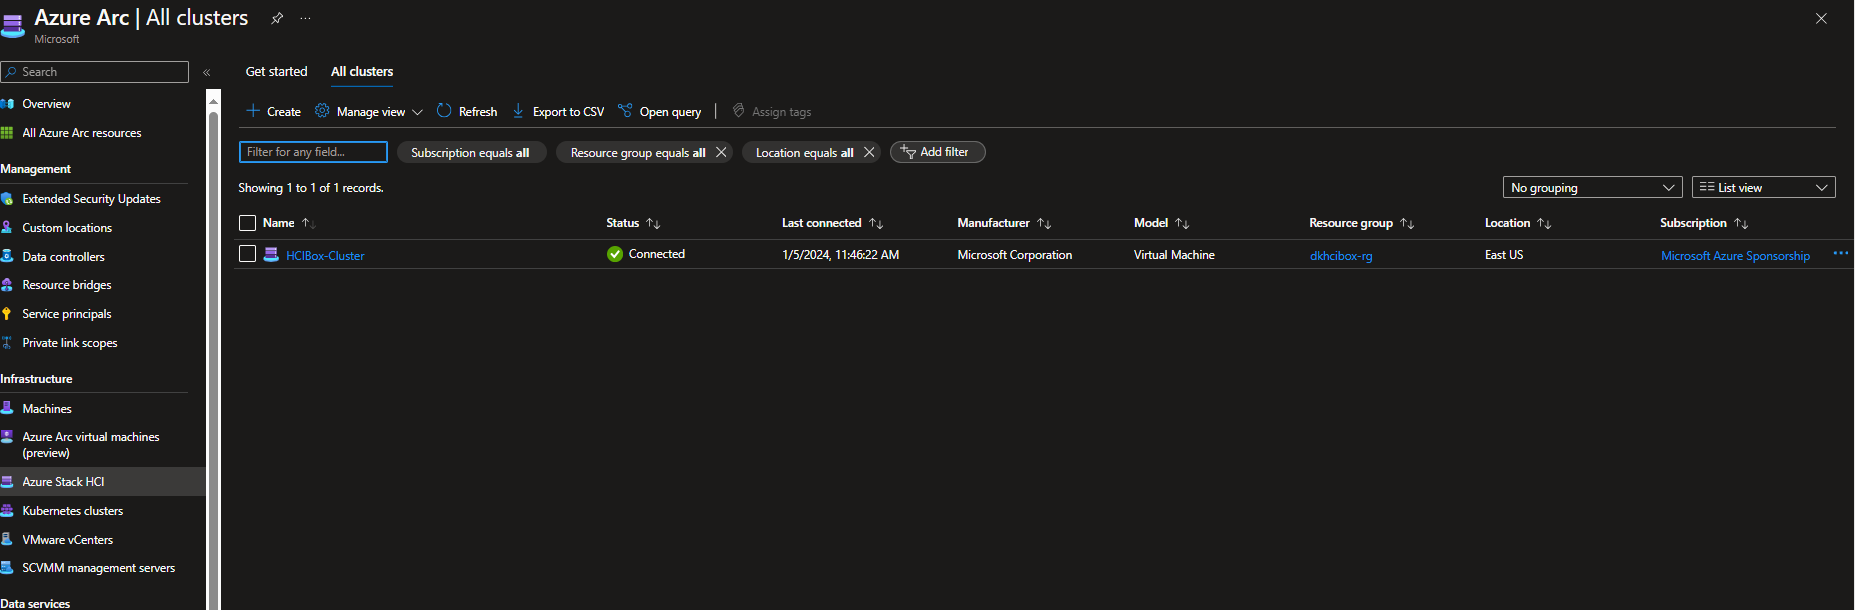
Azure Arc also features an Azure Stack HCI cluster:
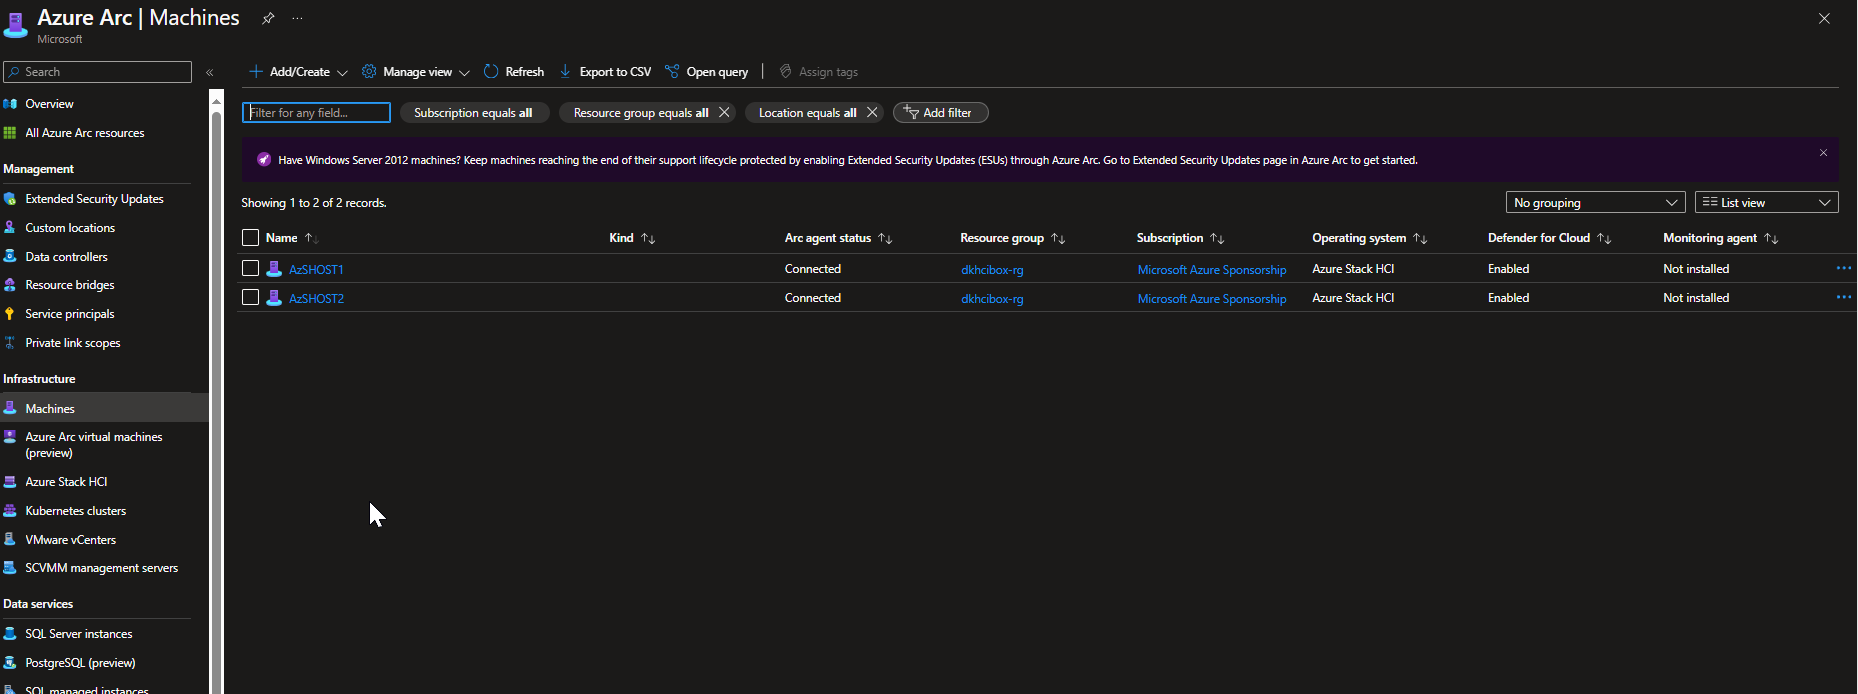
As well as two servers that are part of this cluster:
As it stands, the sandbox has been created and all that’s left to do is test it, but we’ll see soon.
In the next article we’ll look at how to deploy AKS on the HCI cluster and the Resource Bridge for more possibilities
Nicolas VACCARO
Passionnée par l'environnement Cloud, je propose des articles qui pourront aider débutant comme expert.